










Showing posts with label Homeschool Group. Show all posts

Wednesday, August 19, 2015

Clue Town Books - Educational Scavenger Hunts For Atlanta

*This post may contain affiliate links. Please see my Disclosure Page for details.


Clue Town Books were created by Jay Carlson a stay at home dad and creator of The Plug, a monthly web magazine that is part social experiment and part avant-garde life documentation. Clue Town scavenger hunt books are the first of their kind. They combine Jay's love of zines and games into an activity that anyone can enjoy.

A moms review: 
Have you ever wanted to find a way to make visits to Atlanta more fun and exciting for your family? Are you looking for a way to combine education, entertainment and exercise? Well look no further Clue Town Books totally fit the bill! There are 6 books including Piedmont Park, Oakland Cemetery, Downtown Decatur, Atlanta BelLine, Grant Park and Downtown Kirkwood, and hopefully more to come. They are perfect for date nights, birthday parties, team building events, sightseeing, homeschool groups, scouts and more. And they are suitable for adults and children (ages 12 and up can easily complete the hunt on their own but younger children may need assistance). Each full-length booklet includes a compass and pencil.  Full-length books take 60-90 minutes to complete and mini-hunts take 20-40 minutes to complete.


Our homeschool group visited Oakland Cemetery and did The Clue Town book as a group. Oakland Cemetery is the oldest cemetery in Atlanta and was founded in 1850. The 48 acre site mixes Victorian and garden styles within its historic sections. Did you know almost 70,000 people are buried there? The Oakland Cemetery Clue Town booklet takes visitors down brick paths in a respectful scavenger hunt that delivers a beautiful and cultural experiences.

We had children ranging from about 6-12 completing the scavenger hunt and everyone had such a blast that they all agreed we definitely needed to do it again. To complete the hunt and earn the reward at the end of the booklet hunters use the cemetery landmarks to solve a variety of puzzles. Each solution to the puzzles reveal how to get to the next checkpoint. Some of the puzzle types in the Oakland Cemetery book include matching, mazes, rebuses and more. Each family used 1-2 booklets depending on how many children they had. To add to the fun each family that completed hunt had their names entered into a drawing to win Downtown Decatur Clue Town booklet.

Order a few and see for yourself how much fun the Clue Town Books are!

Links to follow:
-Clue Town Website
-Clue Town Facebook
-Clue Town Twitter

Where to buy:
Clue Town booklets can be purchased online or at various stores around Atlanta. Full-length books are $15 and mini-hunts are $7.  


Monday, April 20, 2015

Disneynature Monkey Kingdom - Journal Page, Crafts and More

*This post may contain affiliate links. Please see my Disclosure Page for details.


A couple days ago we went to the theater with our homeschool movie club group to see Disneynature's newest film Monkey Kingdom. If you missed the last movie club update check it out, we wen to see Night At The Museum (there is a fun, free journal page and craft idea on the post that you won't want to miss).

Every few months when a fun, educational movie is released we get together and go to the movies with friends from our homeschool group in Georgia. But that's not all...I also create a journal page centered around the movie and come up with a fun craft project for the group to complete afterwards.

We are huge fans of the Disneynature movies. We have seen them all and even reviewed Chimpanzee when it was released. This movie was just as good as all its predecessors. There were funny, sad, and edge of your seat moments. Plus the movie is really educational. An added bonus of seeing the movie during opening week is that part of the movie ticket proceeds go towards helping protect monkeys and other endangered species in their natural habitats.

After the movie our group got to go behind the scenes to check out the projection room....special thanks to Aurora Cineplex a locally owned and operated theater and entertainment center.


After the movie the kids made two fun crafts. One is craft was about monkeys and the other was about our planet Earth, both go along great with the movie


Earth Rock Craft:

Supplies:
-Blue Paint
-Green Paint
-Rocks
-Paint brush
-Acrylic Spray

Instructions:
  1. Paint the rock blue first and let it dry.
  2. After the rock is dry add some land formations with the green paint.
  3. After the rock has completely dried spray it with acrylic paint.
You can put the Earth rock in your garden, flower pot or just sit it on a shelf.


Monkey Pipe Cleaner Craft:

Supplies:
-4 Brown Pipe Cleaners
-1 Yellow Pipe Cleaner
-Scissors
-Pencil

Instructions:
  1. Cut the brown pipe cleaners into the following sizes: 1- 10 inch, 1 - 6 1/2 inch, 2 - 3 1/2 inch,  2 - 1 inch. Cut the yellow pipe cleaner into the following size: 1 - 1 inch
  2. Take the 6 1/2 inch pipe cleaner piece and make a circle at one end for the head. This is the head/tail.
  3. Next take the 10 inch pipe cleaner piece and create a corkscrew/spring. You can either wrap it around a marker or your finger. This is the body.
  4. Place the corkscrew/spring over the head/tail pipe cleaner piece. Pinch the top and bottom of the body piece onto the head/tail piece to secure.
  5. Next take the two    pieces and place one just below the head and wrap it around once to secure. Place the other piece at the bottom of the body piece and wrap it around to secure. These creates the legs. 
  6. Next take the two   pieces and wrap them around the top of the head to create ears. 
  7. Finally give the monkey a banana to eat by placing the yellow pipe cleaner in one of his hands.
The monkey can now be played with, sat on a shelf and posed, wrapped around a stick and placed in a flower pot or put on the end of a pencil for a cute pencil topper.

Free Monkey Kingdom journal page:
Each family also left with a copy of the journal page I created for the movie. You can download a copy for FREE here (or click the photo below).

Photo courtesy of  Disneynature.
Recommended reading:

More goodies:
  • Visit the Monkey Kingdom website for fun games and downloads, including an educator guide and parent guide.

Don't worry I will share the craft and journal page after each homeschool movie club meeting!

Sunday, April 19, 2015

Roswell Recycling Center Tour + FREE Educational Resources

*This post may contain affiliate links. Please see my Disclosure Page for details.


What better way to celebrate Earth Day than to visit a recycling center! A few days ago I took two small groups of homeschoolers to Roswell Recycling Center for a fieldtrip. We had the greatest time and learned a lot! We learned the importance of recycling, what materials are recyclable, got to watch the bailing machine crush cardboard and even got to recycle some products we brought from home. Trevor is the manager at this facility and did a great job explaining all the nitty, gritty details about recycling to the children (and parents) and she answered everyone's questions. Several of the parents (including myself) found out we were recycling some things we shouldn't be, like plastic bags and cardboard milk cartons. The tour was FREE and lasted about 45 minutes.

After the tour Trevor gave each child a penciled made with recycled newspaper and I handed out a planet protector activity book, trash and climate change activity book and calendar of activities.

Free resources:
You can order FREE materials on the US EPA website or download them here. Also visit the recycle webpage and resources webpage for students and educators...both provide great information, downloads and games.


This center offers recycling of plastic, paper, metal and glass. As well as old appliances, tires, batteries, cell phones, printer cartridges, electronics, televisions, motor oil and antifreeze. Best of all the are open 7 days a week and you don't have to be a Roswell resident to take recycled goods there (some exceptions apply). For more information about the Recycling Center, call 770-442-8822 or visit their website.  And for teens (over the age of 16 years old) and or parents the recycling center is always looking for volunteers. Just give them a a call to set up a day to volunteer and help out the community and the environment. 

Recommended reading:

Have you ever toured a local recycling center? What did you learn?

Tuesday, March 31, 2015

Johns Creek Wastewater Treatment Facility Tour

*This post may contain affiliate links. Please see my Disclosure Page for details.


A few weeks ago we took a fabulous fieldtrip to a wastewater treatment facility in Alpharetta Georgia. This state of the art facility which is called the Johns Creek Environmental Campus offers FREE educational fieldtrips to groups. The 5-acre, award winning facility is located on a 43-acres site off Holcomb Bridge Road in the City of Roswell adjacent to the Chattahoochee River.  The facility can treat up to 15 million gallons per day (MGD). The tour lasts about 2 hours and discusses water quality, water conservation and the water and wastewater treatment processes. The unique STEM opportunity connects nature and technology for elementary, middle and high school students.

For the first 15 minutes of the tour we sat in a classroom where they gave us an overview on the history of the plant, the Membrane Bioreactor (MBR) system, and the overall process of cleaning wastewater. We also got to watch a great power point presentation. 

Afterwards the group split into two smaller groups. One group went with a tour guide on a tour of the plant and the other group participated in a hands on lab activity with the other tour guide...then we swapped.

During the lab activity each child got to participate in a hands on activity to learn exactly how the wastewater is processed. We even got to see several actual water samples (one which included some micro-organisms).

After the lab activity we headed out the mini museum which included a functional model of the Membrane Bioreactor, informational fact boards and old water treatment machinery.


Next it was time for the final leg of our fieldtrip. We swapped with the other group and went on a tour of the actual plant!!! We got to walk through the water treatment process and got to see every pint the water was running through. My kids and I thought the biological process (where the bugs have a party) and ultraviolet disinfection process were the coolest parts. We even got to see where the state-of-the art membrane bioreactors are located, where the testing lab is and even got a sneak peak at the control room. JCEC was one of the first plants of its size to utilized the MBR technology in the United States. We also learned what the plant does to reduce noise and smell for their neighbors.


This educational, fun and FREE tour is perfect for helping children understand not only the "water cycle," but also the "water treatment cycle." 

Both of our tour guides Debra and Cheryl were fabulous. They were really patient and did a great job of keeping the children engaged and answering all of the children's questions. I highly recommend this tour for school groups, homeschool groups, scouts, etc. Tours are only available by appointment.

The JCEC event has downloadable pdfs of the entire water treatment process.

After the tour we headed out to explore the "backyard" of the plant. The landscape outback includes walking trails, fantastic views of the Chattahoochee, a playground, a pond and stream system complete with a covered bridge, over 1,000 trees and shrubs and specially designed stormwater bio retention facilities that help clean stormwater runoff. There are also great placards with lots of information about the land, flora, fauna and water treatment process. I have driven past this place several times and never knew it existed. It is a great spot for a picnic, birdwatching or a nice stroll. This area is open to the public year round. Oh and if you are a geocacher be sure to grab the 3 caches located there.


If you plan on doing a similar tour with a group I highly recommend ordering these FREE resources from the USDA to hand out to families before or after the tour.

Hometown Water
Your Hometown Clean Water Tour activity booklet
Water Cycle
Water Cycle 2 sided poster

There are also some great printables and information on the water cycle here. And a great printable activity booklet and video here. And lastly view some micro-organisms at work in this video.


Sunday, March 29, 2015

Native American Presentation and FREE Journal Page

*This post may contain affiliate links. Please see my Disclosure Page for details.


Earlier this month we had the privileged of having our friend Chipa Wolfe from Rolling Thunder come to give our SE Homeschool Fieldtrip group a presentation. If you have never been to one of Chipa's Powwows in Georgia or heard him speak at a local museum then you NEED to add it to your must experience list! Chipa is an amazing presenter and very passionate about educating children on Native American culture, stewardship and more. We have known Chipa for about 6 years now and anytime we bump into him he always takes the time to talk with the children.

The program Chipa presented to our group included singing, dancing, storytelling, Native American history, audience participation (games, dancing), tribal paint and explanation, flute and drum playing, artifact observation and explanation, learning  The Cherokee alphabet or syllabary and finally a Q and A session. The program also included two conceptual mindsets or curriculum's...breaking stereotypes and stewardship development. To view more about Rolling Thunder's affordable programs for schools and other groups click here.


There were about 50 kids that joined our groups 2 hour private presentation and they ranged from age 4-15 years old. Everyone (both young and old) had a great time and several families mentioned it was one of the BEST educational presentations they have ever attended. Chipa got the children (and even adults) involved in the presentation and encouraged everyone to answer and ask questions. Afterwards he let the children visit his table of artifacts so they could get a chance to touch them and ask anymore questions they had. We learned a lot and left eager to learn more!

Gwyn said her favorite part of the program was buffalo dance. Rowyn said his favorite part was getting his face painted.

Here is a FREE Native American Journal Page I created for my group to compliment the presentation. It can be utilized with any Native American event or studies.


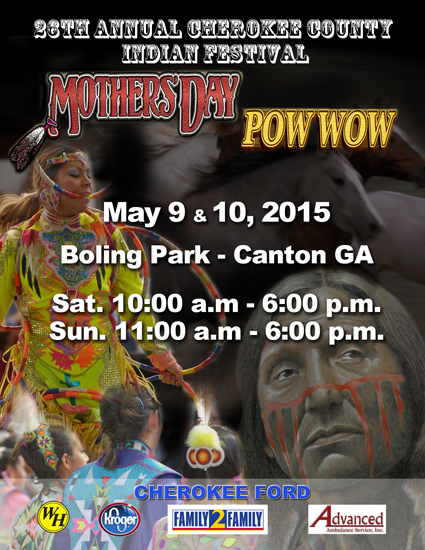
The next public event coming up that you can see Chipa Wolfe at is the Annual Mothers Day Powwow in Canton, Georgia. The event will be on May 9th and 10th. This is my favorite way to celebrate Mother's Day and we go every year. The last couple of years we have actually had the privileged of helping out at the Save the Horses booth.


I also highly recommend getting a copy of Chipa Wolfe's Almost Live CD.

Tuesday, February 17, 2015

Guatemalan Sawdust Carpets Craft

*This post may contain affiliate links. Please see my Disclosure Page for details.


For the last few weeks we have been working on our Guatemala geography fair project. This year we decided to make our board very 3 dimensional. So we have been hard at work coming up with fun projects for our display. In a few weeks I will share our entire board as well as the books and resources we utilized and some of the other craft projects we did. If you missed it be sure to check out our Guatemalan weaving project.

This project was sparked by a book we read called Sawdust Carpets by Amelia Lau Carling and a recent fieldtrip to Home Depot. I remembered that during our Home Depot fieldtrip tour someone (maybe it was me) asked what is done with all of the sawdust they collect after cutting wood for customers. To my surprise they said they just throw it out...surely there must be something you can do with sawdust. Well guess what there is!


About the book:
The book was terrific and both children really enjoyed it.  The story is about a Chinese family living in Guatemala who is invited to spend Easter with their cousins in Antigua. Every Easter Antigua puts on a spectacular Easter procession. During the procession there are beautiful statues, (which are a spectacular example of Spanish colonial art) that are carried during the procession by hundreds of penitents and wreathed in incense. And there are striking, intricate, sawdust carpets created on the cobblestone streets which the processions walk over and ultimately destroy.  Guatemalans spend days creating these spectacular works of art using colored sawdust, fruit and flowers only to see them disappear within seconds. The main character becomes very sad when she realizes the sawdust carpet she and her cousins helped create will be ruined...until a neighbor explains, "This is the custom. We make the rugs as offerings to life." Two days later, on Easter Sunday, the carpet makers and the little girl begin planning their designs for the next year's procession. The book was a great way to teach the children about not only Guatemalan religious traditions, but also some Chinese religious traditions. We learned about the Goddess Kuan Yin, the Virgen de Guadalupe, Dragon Boat Races, Easter processions, pinatas, baptisms, Chinese tamales and more. I highly recommend it if you are learning about Guatemalan, Chinese or Central American cultures. 

Sawdust Carpets craft instructions:

Supplies:
  • Piece of sturdy paper (we used poster board which we cut into 8 1/2 x 11 pieces)
  • Sawdust - make a trip to Home Depot or Lowes and ask them for a bag of sawdust. You may get a weird look but when you explain the project you are creating I am sure they will graciously give you a bag.
  • Food coloring
  • White glue
  • Pencil
  • Foam or plastic cups
  • Plastic spoon
  • Paint brush
  • Optional: flower petals, pine needles and flour  (these are other materials that are used to create sawdust carpets in Guatemala) 

Instructions:
  1. Takes several cups and fill them about half way with sawdust. 
  2. Add several drops of food coloring to each cup and stir until the sawdust is completely colored. We used about 10-15 drops per cup.
  3. Create a picture/design on the poster board with a pencil. 
  4. Add glue to a section of the picture and smear it with a brush or finger.
  5. Then add the colored sawdust onto the glue (just like glitter).
  6. Keep adding sawdust to the picture/design until it is completely covered. 
*See the photos above for examples.

Sit back and enjoy the beautiful sawdust carpet creations which can be hung on the wall rather than being destroyed. 

Monday, February 9, 2015

Homeschool Nature Journal Club and All About Squirrels

*This post may contain affiliate links. Please see my Disclosure Page for details.


About a week ago I had my first homeschool nature journal club meeting for the North Metro Atlanta area. This has been something I have wanted to do for quiet sometime, but have always been too nervous to start. Well I finally took the plunge and the first meeting was fabulous. Nature journaling is something that myself and my children are really passionate about and we have been nature journaling since we started homeschooling in 2011. I wanted to share the joys and importance of nature journaling with other families and so Homeschool Nature Journal Club - Metro Atlanta was created. I will try my best to share each of our monthly meetings on my blog in hopes that it encourages you to start nature journaling with your children or perhaps even start your own club.

First let me tell you how to create a nature journal club group for those that are interested then I will tell you more about our first meeting topic and share exactly everything we covered and the resources we utilized.

Staring a nature journal club: 
It is really not as hard as it sounds. I created the group on Facebook, because for me that is the easiest way to communicate with a large group and post events. I decided to offer meetings for the entire North Metro Atlanta area (which includes Cherokee County, Cobb County, Fulton County, Gwinnett County and more), but you can make it for a smaller region if you want, like just your city or county. I offer two meetings a month and because my group covers multiple counties I offer one on the west side and one on the east side to try to accommodate everyone. In the past I have arranged nature walks with another group I am in and was very disappointed when the day of the nature walk no one or only a couple of families showed. I felt like all my hard work had been for nothing. So with this new, larger group I charge each family a small fee from $5-$7. This basically pays for my time and any supplies I may need for the meeting (like handouts, craft materials, books, etc).

For each meeting I pick a topic and different location so families can get exposed to a variety of nature preserves, parks, etc. Some of the upcoming topics include squirrels, GA birds, mushrooms, worms, pine cones and conifers, macroinvertabrates, spiders and more. At each meeting I talk about the topic, read a book, provide a drawing demonstration, have some sort of hands on activity and then we hit the trail for nature journaling.

For the first meeting I covered what nature journaling is, the reasons why nature journaling is so important, as well as what type of information to put in a nature journal. Be sure to view and download my nature journaling 101 handout.

Of course it is very important to give families a list of the supplies they will need to bring to nature journal club.

What to bring to each meeting:
  • Writing utensils (coloring pencils, crayons, etc)
  • A blank nature journal - it basically needs to have a blank page/spot to draw. If it has some lines to write that is fine. (see below for recommendations)
  • Snack or lunch
  • Nature bag for further exploring
Here are some journal recommendations
  • Miller Pads and Paper - spiral bound, blank space on top with writing lines below
  • Nature Log - Targeted for children, ages five to twelve, Nature Log Kids is a journal that lets youngsters note encounters with nature. Pages to paste photos and artwork add a perfect blend of creativity to each and every entry.
  • Guided Nature Journal - No one could describe Nature Journal as a blank book. Clare Walker Leslie has transformed what could have been an ordinary diary into something truly unique. The text and illustrations offer just the right amount of inspiration and guidance to help the journal-keeper begin and succeed at making this book his or her own.
  • Standard Journal - This stylish journal is a must-have for everyone, from artists and students to writers and professionals! Featuring a natural cork cover that's soft to the touch, this unlined blank book is ideal for note taking, sketching, doodling and more.
  • Handmade diary or handmade brown bag journal

1st Club Meeting  - Squirrels:
Our first meeting was fantastic and my heart jumped for joy when I read the comments parents posted afterwards on the Facebook group.

My non-writing, non-artistic child today enjoying our first nature journaling meet up. He actually took notes about what was being taught and drew a few pictures! We are really going to love this new group! It's all about finding what they love. Stacy

Thank you for a great morning. The nature journaling is going to open a lot of doors for us. We look forward to next month! Stephanie

I heard great things, so glad my husband was able to take them! Looking forward to the next one and meeting you all. Thanks for putting these things together! Sarah

After I covered the nature journaling 101 information I introduced the children to the KWL chart. We discussed what they knew about squirrels, what they wanted to learn and hopefully later they discussed all they had learned with their parents. Since we are unschoolers we use KWL charts a lot.

After the KWL chart I read some interesting squirrel facts to the children. While reading the facts though I worked in some questions, like "what is a mammal," and "what is an herbivore." This helped keep the children involved and interested.

After we covered the facts I asked if anyone had any questions. The weather was a bit chilly so we didn't get around to reading the book I had planned to read, Burgess Book of Animals for Children.

So I passed around the red squirrel skull I purchased on Ebay and showed the children how to tell that squirrels are rodents (long orange teeth). They all really loved the skull!!

I then showed the children how to draw a really simple squirrel. This YouTube video was a great help.


After the drawing lesson I verbally gave the children a list of questions to think about as they observed the squirrels (these were taken out of the Handbook of Nature Study book). Then I handed out little cups of birdseed and gave them each a little squirrel ornament goodie for being so well behaved. I also encouraged them to do journal entries in between our meetings and told them at the next meeting I will ask for volunteers to share some of their entries.

Then we hit the trial! During our walk we didn't see many squirrels...can you believe it.  Luckily though most of the children said they have squirrels in their backyard so they promised to go home and watch the squirrels in their yard. We did all sit down though to create journal entries. Some children journaled about squirrels, others journaled about other things like trees and birds.

Be sure to download a copy of my squirrel nature journal club guide.

Here are some of the additional books I took along for the children to look at:

The first meeting was tons of fun and I am looking forward to so many more fun nature journal club adventures. I hope this post inspires you to get your children outdoors!

Monday, March 3, 2014

Voyage Around The World

*This post contains affiliate links. Please see my Disclosure Page for details.


Last week our homeschool group had our annual geography fair. We really enjoy doing projects like this with our group. It is so much fun and a great hands on way for the kids to learn about different countries and cultures. In one day we were able to take a voyage around the world to visit about 12 countries. If you are part of a homeschool group I highly encourage you to set up a geography fair.

Our family chose to do England, another country that I had an opportunity to visit with People to People Student Ambassadors. Before we started learning about England I dug out my photo albums and keepsake box which the kids had a blast digging through. They were full of questions and wanted to know all about the trip I took in 1999.

After they were done exploring we utilized many of the books that I purchased during my travels as well as several from the library to learn all about England. Then we put on some Beatles music and sorted through my keepsakes. The kids picked out the postcards, brochures, souvenirs, coins, and photos that they wanted to include on their board. I went online and printed the map, flag, crest, crown jewels, national animal and flower. I printed these items in black and white so the kids could color them in...really making the project their own. We also printed a colored photo of Queen Elizabeth II and the native animals of England.

Last year when we did our Australia project we had a lot more text on our board, but because of the age group that generally attends we decided to include more visuals and less text this year. The text that we included was very simple and in a bulleted format. We included the names of some famous scientists, artists, authors and singers. As well as various facts, British words and information about the climate, holidays and type of government. And of course no project is complete without a Lego sculpture. Rowyn's task was to build Big Ben! He did a fabulous job and Gwyn helped him with the clock face.


For our authentic dish we choose to go with shortbread cookies and tea. Gwyn made the cookies all by herself and they turned out great. They were a huge hit with all of the kids.

Here is the recipe we used:

Shortbread Cookies
Makes about 2 dozen

Ingredients:
-2 cups of softened butter
-1 cup of sugar
-3 teaspoons of vanilla
-4 cups of flour

1. Preheat the oven to 350 degrees.
2. Cream the butter and sugar until fluffy. Then stir in the vanilla, add the flour and mix well.
3. Roll out the dough and use a cookie cutter to cut the cookies.
4. Put the cookies onto a baking sheet and bake for 10-12 minutes.
5. If you choose melt some chocolate chips and dip half of each shortbread cookie into the melted chocolate. They taste great though with or without chocolate.


Take a look at all of these amazing projects.


Each family spent lots of time preparing their display boards, costumes, authentic dishes and even dances. It was amazing to see how unique each one was. During the fair each family got a chance to talk about their country and share their board. All of the kids did a fabulous job and we all learned some really great facts about some really amazing destinations!


To enhance the learning experience even more I made my kids their very own passports. I used this FREE passport printable from Guest Hollow. I laminated the front and back cover to make it sturdy. And on inside the kids filled out their passports and pasted a photo of themselves. At the geography fair they wrote or drew pictures in their passports as they visited each country. I was very pleased with how these turned out and even more pleased at how great the kids did with filling them in. 

So my kids want to know, what country do you want to visit?

Hello and welcome to my new link up Make It Monday! If you or your children made something awesome recently link it up. It can be a Lego creation, a beautiful masterpiece, a creative craft or a delicious recipe...you get the point! If it is something you made and created with your own two hands you can link it up.


If you have a creation to share
please link up at the bottom of this post!
Feel free to copy this button to share
somewhere on your blog.


Linking up with: Jay Daniel 4's Mom, Mama to 4 Blessings, Ben and Me

Thursday, February 6, 2014

Reputable People In History - FREE Biography Journal Page

*This post contains affiliate links. Please see my Disclosure Page for details.


This week we had a blast at our monthly homeschool group book club meeting. The book theme was biographies. Each child picked out their own book on the person they were interested in learning about. For the meeting they each dressed up as their famous person and told the group what they learned. My children choose Alexander Graham Bell and Moina Belle Michael. We had such a blast and the all of children learned a lot. I highly suggest arranging a biography book club meeting with your homeschool group!

The books my children read were The Poppy Lady and Alexander Graham Bell Rookie Biography.


5 Facts About Moina Belle Michael:
1) She was born in New Hope, GA.
2) She was a teacher at University of Georgia Normal School.
3) She turned the poppy into a symbol of remembrance for Americans and Allied nations.
4) She was a philanthropist.
5) She wrote the following poem in response to the famous Flanders Fields poem written by McCrae.

And now the Torch and Poppy red
We wear in honor of our dead.
Fear not that ye have died for naught,
We'll teach the lesson that ye wrought
In Flanders Fields. 

5 Facts About Alexander Graham Bell:
1) He was born in Scotland.
2) He was homeschooled.
3) He taught deaf people.
4) He invented the telephone and many other inventions.
5) He died from diabetes.

Since Rowyn was learning about Alexander Graham Bell we thought it would be fun to incorporate a fieldtrip as well. So we visited the FREE AT&T Telephone museum in Atlanta with a small group of friends. This place is run by a group of volunteers so you must schedule a tour appointment. The tour lasted about an hour and there were photographs, artifacts, tapes, slides and one interactive exhibit where children could use a rotary phone system. The children all had a good time and learned quite a bit too. Visiting the museum was very special for me and gave me a look back into the past of my Great, Great Aunt who used to work for Ma Bell!


More photos from our biography book club meeting:


I made this biography journal page for my children be sure to download yours for FREE (click on the photo or the link).


If you like my children's costumes and want instructions on the poppies, wig, and hat here they are.

Poppies:
Gwyn wanted to hand poppies out to all of the children so we made this fun craft!

Materials:
-Scissors
-Hot glue
-Small brown pom poms
-Red tissue paper
-Green pipe cleaners

What to do:
1) Cut 2 four leaf clover shapes out of the red tissue paper (see photo for example).
2) Stack them on top of each other alternating the petals.
3) Poke the green pipe cleaner through the center and twist the tip down to secure.
4) Pull the tissue paper petals up around the tip of the pipe cleaner. Take the long end of the pipe cleaner and wrap it (very carefully) around the tissue paper 1-2 times to secure.
5) Glue a brown pom pom in the center.


Cotton ball wig and beard:
Materials:
-1 bag of cotton balls
-Shower cap
-White ribbon
-White felt
-Low temp hot glue

What to do:
Wig:
1) Glue cotton balls onto a shower cap. To keep the cap from melting too much glue the cotton balls to each other rather than the cap.
2) Keep adding cotton balls until the cap is completely filled in. To cover my sons hairline I had to add cotton balls past the cap by gluing them to each other.

Beard:
1) Create a felt base (see photo below). Glue cotton balls onto the felt.
2) Glue ribbon onto the ends so you can tie the beard on.

*This is a very fragile wig and beard so it's really only good for one use. But it only cost about $3 so you can't beat it!


1900's hat:
Materials:
-Scissors
-Tape
-2 paper plates
-Construction paper
-String
-Embellishments (ribbon, flowers, etc)

What to do:
1) Cut the 2 paper plates - 1 plate you need the outer ring intact and 1 plate you need the center intact.
2) Cut 2 strips of construction paper (ours was 2 inches wide) and cut little slits along one side.
3) Tape the slits (a few at a time) to the inside of the paper plate. This will form a circular tube..
4) Cut another piece of construction paper the same size as the paper plate with the center cut out. And slide it down over the tube to make the brim. If you want you can trim the paper plate underneath so it doesn't show.
5) Cut another piece of construction and cover the paper plate circle. Fasten the circle to the top of the tube by applying tape on the inside of the tube.
6) Tape 2 pieces of string onto the underside of the tube so you can tie the hat onto the child's head.
7) Decorate the hat with a ribbon, sash, flowers etc.


For more resources on biographies check out my Biographies Pinterest Board and Biographies YouTube Channel. I am always adding more resources.


Wednesday, January 22, 2014

Homeschool Community - Friends and Groups

*This post contains affiliate links. Please see my Disclosure Page for details.

Welcome to day 3 of the 5 day homeschool essentials blog hop. Homeschool essentials will be different for every homeschool family. So make sure you visit the other TOS crew members to see what their essentials are. I hope you enjoy this blog hop series and find some helpful information along the way!

Be sure to stop by everyday this week to find out what our other homeschool essentials are.

Our homeschool friends and our amazing homeschool group with 115 families is definitely a homeschool essential for us. Friends and groups are not only important for the children but also for me. Having the support of other moms who understand the daily joys and struggles I am dealing with everyday is very important!!! And this applies to both my online and "in real life" friends. I am blessed to have an amazing close knit group of homeschool mom friends who I meet with on a weekly basis. But I also treasure my many online homeschool mom friends too. There are several that I have met IRL (in real life) but the majority of them I have only spoken with online via social media. My friends are part of my support system and a big part of what keeps me going, especially on the rough days. Each and every time I need them I can count on at least one (often more) of them to be there to listen to me and offer advice. When we began homeschooling in 2011 my husband insisted that I make friends (something I have always had a hard time with since becoming a mom) and that I get out of the house at least once a month for some "alone time". Thank goodness a fabulous homeschool group popped up at the beginning 2012!!! I met some of the most amazing women who I not only became great friends with but who I can also sneak out of the house with once a month for some much needed "alone" time!


That crazy stereotype about homeschooled children being unsocialized always makes me laugh...hysterically. My kids have way more friends than they ever would if they were in public school. Those 115 families in our homeschool group each have 2+ kids...that's a lot of friends and acquaintances. And I love that not all of their friends are the same age as them. They have younger friends and older friends all whom they get along great with. They see several of their friends at least once a week for various events such as parties, clubs, fieldtrips or play dates. And my children have no problem making new friends. It doesn't matter where we go they will make a friend even if it is an 80 year old lady. They cherish their friends and rely on their friends just as much as I do mine!


If you are not part of a homeschool group I highly encourage you to search Yahoo Groups and Meetup to try to find local groups in your area to connect with...or perhaps start your own.

Also be sure to head over to Schoolhouse Review Crew Blog to see what else is essential to homeschoolers across the globe!

Here are a few quick links to some of my bloggy friends:

Shalynne @ Wonderfully Chaotic
Jody @ Because I’m Me
Melanie @ A Year of Jubilee Reviews
Emilee @ Pea of Sweetness
Nikki @ Angels of Heart
Sara @ Embracing Destiny
Heather @ Only Passionate Curiosity
Jennifer @ Simblissity Cottage
Kathy @ Kathys Cluttered Mind
Annette @ A Net in Time


What is essential in your homeschool?

 
Designed By: Wacky Jacqui's Designs