







Showing posts with label Experiments. Show all posts

Monday, April 27, 2015

Down On The Farm - Books, Seed Experiment and More

*This post may contain affiliate links. Please see my Disclosure Page for details.


We had tons of fun with the Poppins Book Nook blog series last year and we will be continuing that fun all throughout 2015. This month's theme was, "Farms" Keep reading to learn more about the books we read, experiment we did and to grab your FREE science experiment journal page. There is also a giveaway at the end of the post! To check out all of our past Poppins Book Nook posts click here.


Books:
This months theme was farms and we read two different books. The first book we read is a classic, The Little Red Hen. This book is about Little Red Hen and her farm animal friends and teaches a valuable lesson about teamwork. It is one of my favorite folktales and fit nicely with the farm theme.

The second book read was In The Barn (Historic Communities). In the Barn shows how the barn was the center of activity on a busy settler farm. Types of barns, barn tools, barnyard animals, children's chores, the barn through the seasons, and more are covered in this fun book. 

More great books about farms you should check out include: The Complete Book of Farmyard Tales, Peek Inside The Farm,  and 1001 Things To Spot On The Farm.

Picture of 1001 Things to Spot on the Farm Sticker Book

Experiment:
We did a fun experiment this month to go along with our farm books. Since Spring is here and we learned about different types of crops we thought watching seeds germinate would be a fun experiment. We planted corn seeds and beans in ours, but you could do other seed types. 


Materials:
  • Large plastic cup
  • Paper towel folded about 10 inches x 10 inches (thick brown paper towel works best)
  • Seeds
  • Water
  • Soil
Instructions:
  1. Fold the paper towel in half to make it thicker (it should be about 5 inches x 10 inches). Place the paper towel inside the cup so that it is circling the inside, 
  2. Fill the cup on the inside of the paper towel with soil.
  3. Add 3/4 cup of tap water to the container and wait 5 minutes for the water to saturate the paper towel.
  4. Add seeds in between the plastic cup and paper towel, about 1 inch below the edge of the paper. 
  5. Sit back and watch the seeds grow.
  6. When the top edge of the paper becomes dry add more water.
Have fun and experiment with different types of seeds. Observe the roots, stems, leaves, etc as the plant grows.


YouTube Video About Corn:


Free Journal Pages:
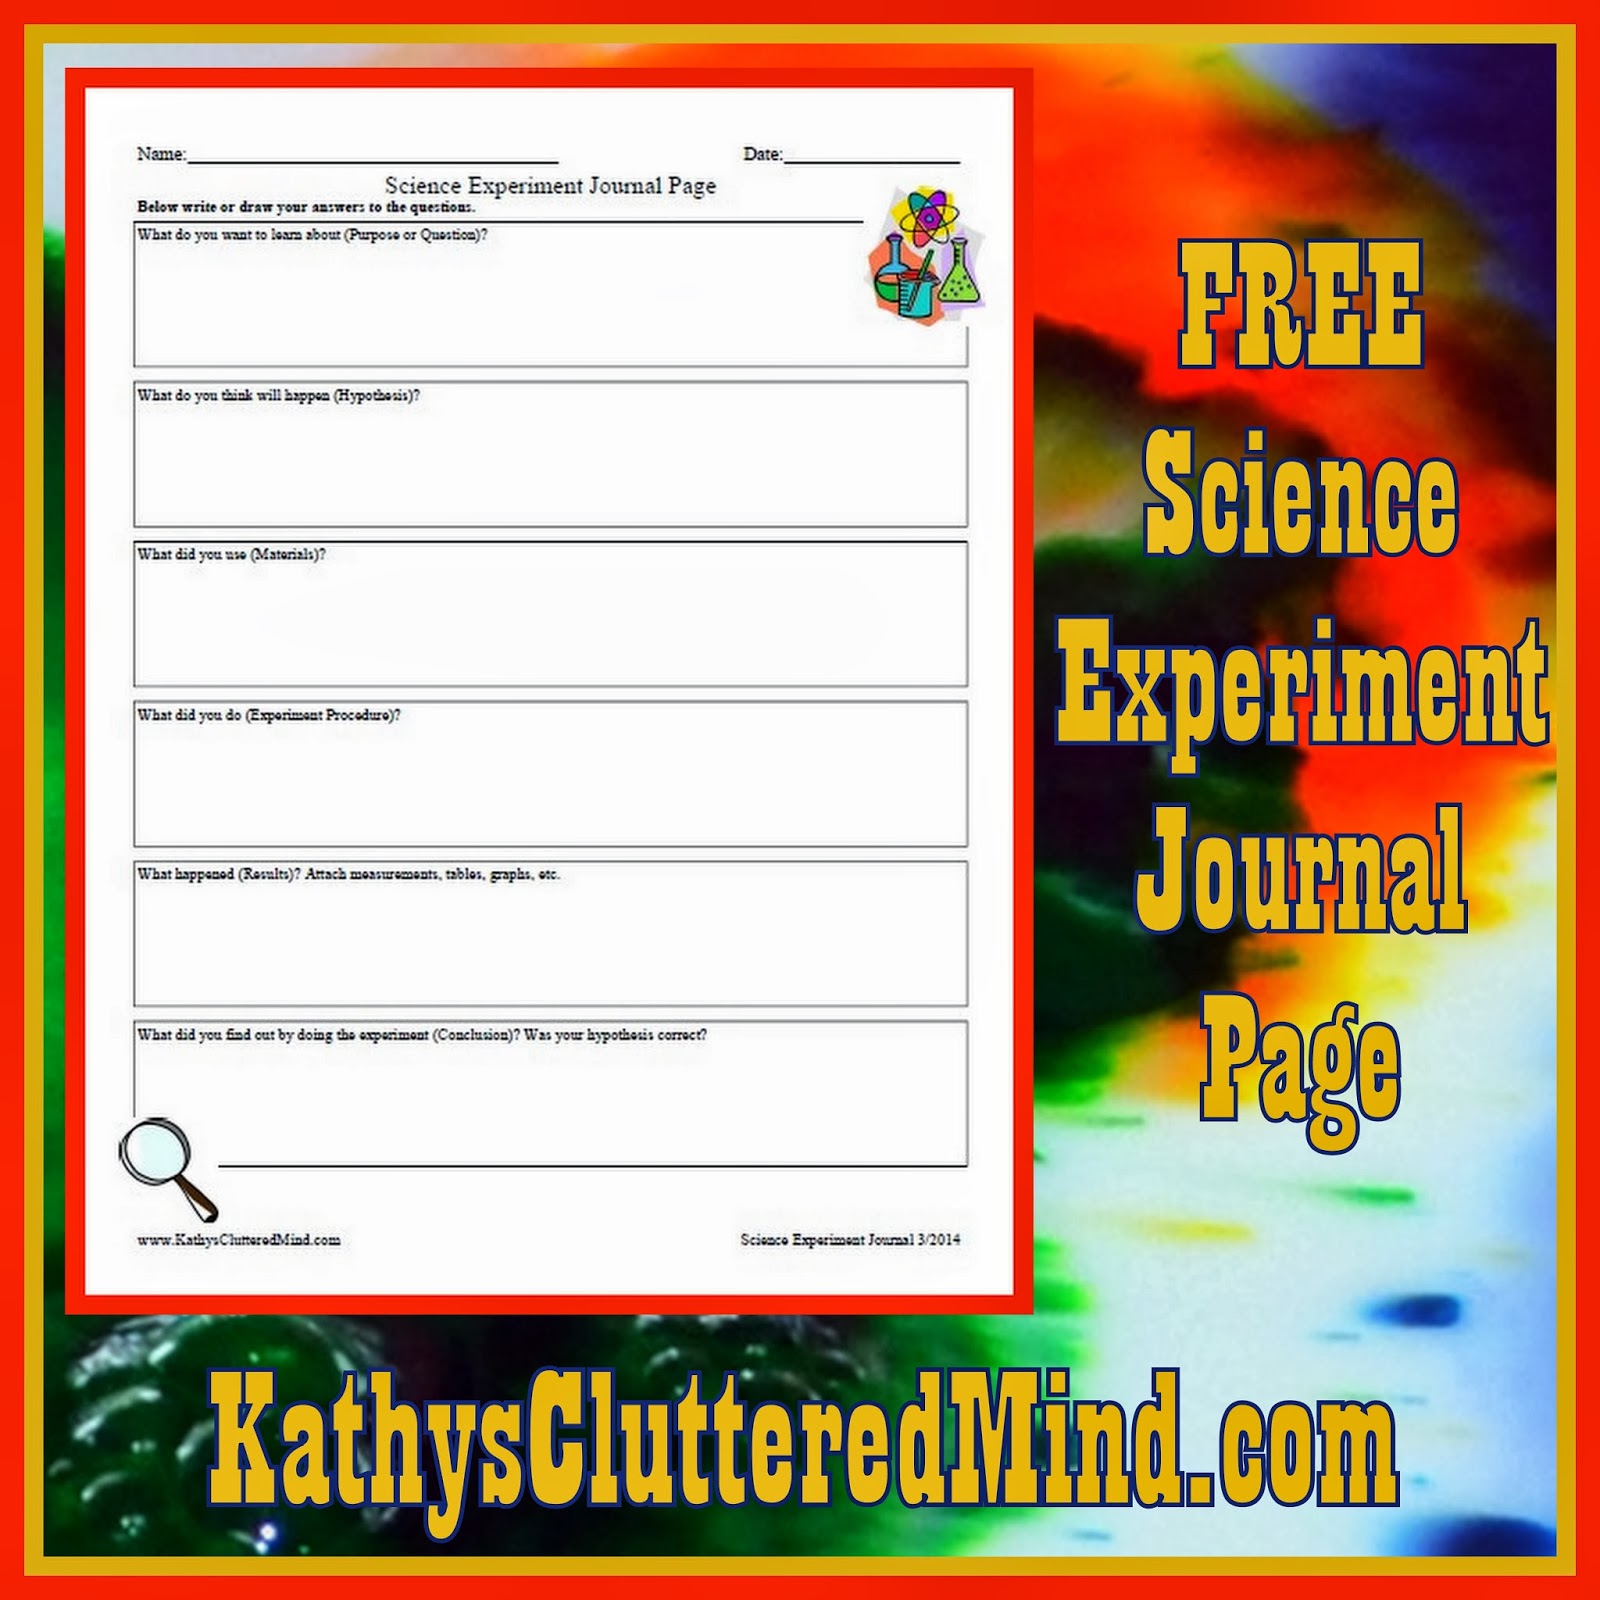
Here is the Science Experiment journal page that goes along great with the seed experiment. Download your copy here or click the picture below.


Free Farm Lapbook:
Head over to Enchanted Homeschooling Mom to grab a Free Farm Lapbook!


Poppins Book Nook Farms Activity Pack


Here is a list of the wonderful bloggers participating in the Poppins Book Nook be sure to visit them for more fun ideas:


Down on the Farm Bundle Giveaway!
Swing your partner round and round and come on down to the farm this month with the Poppins Book Nook! Every month this group will be offering readers a chance to win a brand new storybook or product that ties in with our theme for the month. This month one lucky entrant will win the Down on the Farm Bundle. The winner will enjoy two fun farm themed learning items. The two items that they will win is the Farming storybook by author Gail Gibbons and Safari Ltd Farm Babies TOOB. Let the farm themed learning fun begin! 

Entrants must be 18 years or older and reside in a country that receives U.S. Postal mail. This giveaway is brought to you by the company Enchanted Homeschooling Momwho is owner and founder of the Poppins Book Nook. By entering this giveaway you are also acknowledging that you have read and agree to all of the PromoSimple terms & conditions as well as Enchanted Homeschooling Mom's disclosures found here. 

Just enter the PromoSimple below to win:


Image attribute: Melonheadzdoodles CollectiveCreation

Monday, March 30, 2015

Twisting Tornadoes - Craft, Experiment, Journal Page and More

*This post may contain affiliate links. Please see my Disclosure Page for details.


We had tons of fun with the Poppins Book Nook blog series last year and we will be continuing that fun all throughout 2015. This month's theme was, "Weather" Keep reading to learn more about the book we read, the craft we made and to grab your FREE weather journal page. There is also a giveaway is at the end of the post! To check out all of our past Poppins Book Nook posts click here.


Books:
This months theme was weather and since we are about to hit tornado season here in Georgia the kids decided to read Twisters and Other Terrible Storms which is a Magic Tree House Research Guide. The book is filled with fun facts, photos, illustrations, definitions and more about twisters, hurricanes, blizzards and storm chasers. Some of the things we learned about were how tornadoes form, what kinds of tools help predict bad storms and the different cloud types.

Free Resources:
This past Saturday while visiting the Atlanta Science Expo we found a great resource at the CDC Booth that went along perfectly with our weather theme. And guess what you can download your very own copy of Ready Wrigley Prepares For Tornadoes for FREE. This activity booklet is filled with information and activities to help children learn more about tornadoes and how to prepare for a tornado.


Craft:
For our craft we made a tornado with homemade puffy paint.


Supplies:
  • Cardstock
  • Foam shaving cream
  • Glue
  • Black glitter
  • Black paint
  • Debris (leaves, twigs, flowers)
  • Monopoly house
  • Markers
  • Paint brush
Instructions:
  1. Mix equal parts of foam shaving cream and glue. Add a little bit of black paint and mix it into the shaving cream and glue mixture. For some added fun you can add some black glitter. Don't over mix the mixture, you want it to be foamy.
  2. Use a paint brush to create a twister on the cardstock.
  3. Add some debris and a monopoly house (or two) onto the twister. The materials should stick to the glue/shaving cream mixture without any issues...but if it doesn't you can glue the pieces onto the twister.
  4. Draw a city or town at the bottom of the picture. 
  5. Let it dry.

Experiment:
What better way to learn about twisters than to create one in a jar. We have done this experiment several times and always have tones of fun with it. 


Materials:
  • Pint sized jar (small jars seemed to work better)
  • Tsp of dish soap (NOT Dawn, Dial worked much better)
  • Tsp of vinegar
  • Food coloring
Instructions:
  1. Fill a jar with warm water, add teaspoon of dish soap and a teaspoon of vinegar. You can also add some food coloring. 
  2. Put the lid on very tightly and shake in a circular motion with the jar parallel to the floor for 5-10 seconds. Ta-dah! You have made a tornado in a jar...about an F1 or F2.

Have fun and experiment with different amounts of soap, water temperature and soap types to see what combination produces a better tornado. The above mentioned materials were what worked best for us. 

Why it works:
Inside the jar, the fluid on the outside starts spinning before the fluid at the center. When you set the jar down, you see the fluid on the outside slowing down as the fluid on the inside continues to spin. You are seeing the formation of a vortex.  

Free Weather Journal Page:
Here is the Weather journal page that we used for this months theme. Download your copy here or click the picture below.


Here is a list of the wonderful bloggers participating in the Poppins Book Nook be sure to visit them for more fun ideas:


Kid’s Meterologist Bundle Giveaway!
Every month the Poppins Book Nook group will be offering readers a chance to win a brand new storybook or product that ties in with our theme for the month. This month one lucky entrant will win the Kid’s Meteorologist In The Making Bundle. The winner will enjoy two fun weather themed learning items. The two items that they will win is the Weather Tracker and National Geographic’s Kid’s Everything Weather. These two wondrous weather items can bring your children a fun weather activity or two.

Entrants must be 18 years or older and reside in a country that receives U.S. Postal mail. This giveaway is brought to you by the company Enchanted Homeschooling Momwho is owner and founder of the Poppins Book Nook. By entering this giveaway you are also acknowledging that you have read and agree to all of the PromoSimple terms & conditions as well as Enchanted Homeschooling Mom's disclosures found here. 

Just enter the PromoSimple below to win:


Melonheadzdoodles CollectiveCreation

Monday, January 26, 2015

To The Laboratory - Rock Candy Experiment

*This post may contain affiliate links. Please see my Disclosure Page for details.


We had tons of fun with the Poppins Book Nook blog series last year and we will be continuing that fun all throughout 2015. This month's theme was, "To The Lab" Keep reading to learn more about the book we read and recipe we made. There is also a giveaway is at the end of the post! To check out all of our past Poppins Book Nook posts click here.

Books:
This month we decided to read a book from our favorite picture book science series - The Magic School Bus. The Magic School Bus and The Science Fair Expedition is one of my favorite Magic School Bus books because it dives into what science is and how scientists think and work. But that's not all. This book also incorporates some fun history and geography facts too...I love it when books cover multiple subjects. During the fieldtrip Ms. Friz travels back in time with the class to some far away countries to meet some very famous scientists including Galileo, Issac Newton, Louis Pasteur, Pierre and Marie Currie, Albert Einstein and more. Our science experiment (see below) was inspired by the Curie's.

More about the book:
What do Galileo, Isaac Newton, Louis Pasteur, and Albert Einstein have in common? They've all ridden on the Magic School Bus, of course!

Ms. Frizzle is back in action and she has a mission: her students need science fair projects - and fast. What better way to get ideas than to learn from some of the all-time greats? The class heads to the Walkerville Science Museum to see the exhibit on GREAT SCIENTISTS THROUGH THE AGES, where, suddenly, Galileo comes to life! He is about to make a great discovery, but he needs a ride home. Thank goodness Ms. Frizzle knows the way!


Experiment: 
This experiment is a safe way to learn how the Curie's separated Radium from pitchblende. The Curies boiled pitchblende and then let it cool. Afterwards they skimmed crystals off the top and tested them for radioactivity. Then they saved the radioactive crystals and did it all over again.

To make rock candy you follow very similar steps....

Supplies:
  • A wooden skewer (you can also use a clean wooden chopstick)
  • A clothespin
  • 1 cup of water
  • 2-3 cups of sugar
  • A tall narrow glass/jar or small plastic cups
  • Food coloring
  • Flavoring (like vanilla, maple syrup, cinnamon)
**Requires adults supervision since a stove will be used!

Instructions:

  1. Clip the wooden skewer into the clothespin so that it hangs down inside the glass and is about 1 inch  from the bottom of the glass or cup (see photo below). Remove the skewer and clothespin and set them aside for now.
  2. Pour the water into a pan and bring it to boil.
  3. Pour about 1/4 cup of sugar into the boiling water, and stir it until it dissolves.
  4. Keep adding more sugar, each time stirring it until it dissolves and until no more will dissolve. This takes a little bit of time and patience and it will take longer for the sugar to dissolve each time. Be sure you don't give up too soon. Once no more sugar will dissolve, remove it from heat and allow it to cool for at least 20 minutes.
  5. While it is cooling, dip half of the skewer in the sugar solution and then roll it in some sugar to jump start the crystal growth. If you do this, be sure to let the skewer cool completely so that sugar crystals do not fall off when you place it back in the glass.
  6. Also while you are waiting add some food coloring and flavoring to the jar/cup (see photo below).
  7. Carefully pour the sugar solution into the jar/cup almost to the top. Then submerge the skewer back into the glass making sure that it is hanging straight down the middle without touching the sides.
  8. Allow the jar/cup to fully cool and put it someplace where it will not be disturbed (if it gets disturbed by impatient children it will not work correctly).
  9. Now wait patiently. The sugar crystals will grow over the next 2-7 days.
  10. For best results you will want to carefully remove the skewer and place it into a fresh cup around day 2. Pour the liquid from the first cup into the new cup. The reason for this is that the crystals can start to build up too much around the bottom and the sides keeping it from growing on the skewer. For little rock candy pieces (like you see in the photo) scrap the sides and bottom of the first cup, then let the pieces dry on a plastic or glass plate.
  11. After about 4-7 days you can remove your skewer and you should have some nice crystal growth and a yummy rock candy lollipop treat.
How it works?
By mixing the water and sugar together you make a SUPER saturated solution. This means that the water can only hold the sugar if they are both very hot. As the water cools the sugar "comes out" of the solution and turns back into sugar crystals that show up on the skewer and sides of the jar/glass. 


Free Science Experiment Journal Page:
To enhance science experiments and introduce the scientific method to children I created this science experiment journal page. Children can write or draw their answers. Get yours here for FREE.


Here is a list of the wonderful bloggers participating in the Poppins Book Nook be sure to visit them for more fun ideas:

Enchanted Homeschooling Mom ~ 3 Dinosaurs ~ To the Moon and Back ~ Planet Smarty Pants ~ Farm Fresh Adventures ~ Growing in Gods Grace ~ Chestnut Grove Academy ~ Learning and Growing the Piwi Way ~ The Usual Mayhem~ Preschool Powol Packets ~ Monsters Ed Homeschool Academy ~ Adventures in Mommydom ~Teach Beside Me ~ Life with Moore Babies ~ Kathy's Cluttered Mind ~ Are We There Yet? ~ Our Crafts N Things ~Hopkins Homeschool ~ ABC Creative Learning ~ Joy Focused Learning ~ P is for Preschooler ~ My Bright Firefly ~A Mommy's Adventures ~ Inspiring 2 New Hampshire Children ~ World for Learning ~ Ever After in the Woods ~Golden Grasses ~ A glimpse of our life ~ Journey to Excellence ~ Happy Little Homemaker ~ Little Homeschool Blessings ~ Raventhreads ~ Tots and Me ~ As We Walk Along The Road ~ Stir the Wonder ~ For This Season ~Where Imagination Grows ~ The Canadian Homeschooler ~ School Time Snippets ~ Peakle Pie ~ A Moment in our World ~ Every Bed of Roses ~ Finchnwren ~ At Home Where Life Happens ~ The Library Adventure ~ Embracing Destiny ~ Day by Day in our World ~ Our Homeschool Studio ~ A  Peace  of Mind ~ Thou Shall Not Whine ~ SAHM I am  ~ Simple Living Mama


Ultimate Gruffalo Giveaway!
Every month the Poppins Book Nook group will be offering readers a chance to win a brand new storybook or product that ties in with our theme for the month. This month one lucky entrant will win the Ultimate Gruffalo Giveaway. The winner will enjoy twice the magical enchantment in the double feature of The Gruffalo and The Gruffalo's Child! The beautifully animated films based on the best-selling books are now together on DVD from NCircle Entertainment! And the fun doesn’t stop there as they will also win a storybook of the Gruffalo and a Gruffalo themed plush too!

Entrants must be 18 years or older and reside in a country that receives U.S. Postal mail. This giveaway is brought to you by the company Enchanted Homeschooling Mom who is owner and founder of the Poppins Book Nook and this month’s prize bundle will be sent to the winner directly from this month’s sponsor NCircle Entertainment. By entering this giveaway you are also acknowledging that you have read and agree to all of the Rafflecopter terms & conditions as well as Enchanted Homeschooling Mom's disclosures found here. 

Just enter the Rafflecopter below to win:

a Rafflecopter giveaway


Monday, March 10, 2014

ScienceandMath.com Amazing Science DVD Review

*This post may contain affiliate links. Please see my Disclosure Page for details.


ScienceandMath.com was created by Jason Gibson in 2004. His mission, "to kindle your love of Science, Math and the world around you!" Jason's award winning videos for math (grades 4th -12th as well as college) and amazing science are very educational, fun and interactive. They not only help you learn about math and science, but they also show you how they fit together! Jason has a MS in Electrical Engineering & one in Physics, and has worked for NASA for several years prior to leaving to work on his video series.

"In other words, learning doesn't have to be from a textbook - you can learn science just by taking the time to look at the world around you!" Jason Gibson

A moms review: 
We received a copy of the Amazing Science! Volume 1 DVD set to review. We are a very hands on family when it comes to science...well any subject really. Science just makes more sense and comes to life wheyn you do science experiments. I have no fear about experiments and love exploring, learning and getting messy with my children...but I have some friends and readers who are very apprehensive about science exploration and Amazing Science can totally change that!

The Amazing Science! DVD set contains 2 DVDs with a total of 23 experiments. Jason takes his passion for how things work and shows families that by using a few simple materials you can learn a great deal about science in your own home through easy and fun experiments. The DVDs are recommended for children in grades 1st-3rd, however slightly younger and older can definitely benefit from these as well. They are also very affordable and cost about the same price as a movie DVD. Throughout these DVDs you will learn about heat, electricity, magnetism, temperature, buoyancy, surface tension and more. Each of the experiments uses easy to find materials, many of which you probably already have laying around the house. The videos are high quality, have great sound and use multiple camera views making it easy to see exactly what happens and what you need to do to complete the experiment yourself.

Jason goes above and beyond just the experiment though. He also explains the how's and why's for each experiment in a step-by-step fashion. This is because it shows children that science doesn't have to be overly complicated and full of really big words that make no sense. Jason's instructions, descriptions and explanations are very clear and easy to understand. He also takes time to explain safety precautions as well like wearing goggles and asking an adult for supervision with fire, etc.

You can see the whole list of experiments here as well as watch a few of them too!


So for the past several weeks my 6 1/2 and 8 year old have been having a blast with these fun, easy and very educational experiments. About 3-4 times a week we would complete a science experiment though there were many days we completed 2 or more in one day. Each experiment video is about 10-15 minutes long so they are perfect for short attention spans. The actual experiment also takes about the same amount of time...unless your children want to keep doing it over and over again! Many of the experiments my children could do themselves. We have done all but 3 of the experiments and they ALL worked great! 


There were a couple of things that I added to Amazing Science to make it easier for our family as well as reinforce what the children were learning. Because I love sharing anything what I create for our family here are the two printables I made.

ScienceandMath.com Amazing Science! supply list:
I could not find a supply list on the website so I decided to make my own Amazing Science Supply List to make it a little easier to figure out what we needed to purchase and what we would need each day for the experiments. I cut the margins off the print out and it fits perfectly inside the CD case. Print your own supply list here.


Science Experiment printable:
To enhance the lessons and introduce the scientific method to the children I created this science experiment journal page. Children can write or draw their answers. Get yours here for FREE.


Want to see some of the fun the kids had? Check out our video:


FREE stuff:
Be sure to sign-up for FREE videos via email at ScienceandMath.com.

Gwyns review (8 yrs old) and Rowyns review (6 1/2 yrs old):
Gwyn, "I had lots of fun with the experiments. They were easy and we could do most of them on our own, except the ones with fire. I can't wait to do them again."

Rowyn, "I like the matchstick speedboat. It was fun to do science learning. The experiments were super easy."

Links to follow:
-ScienceandMath.com Website
-ScienceandMath.com Facebook

Where to buy:
You can purchase the Amazing Science! Volume 1 for just $17.95 which includes both DVD's filled with experiments. Or you can get these great video's immediately by purchasing the downloadable version for $14.99. 

Click here for more ScienceandMath.com reviews from the The Schoolhouse Review Crew.

Click to read Crew Reviews


Wednesday, September 26, 2012

Learning About Extinct and Prehistoric Birds - Like the Dodo and Dromornithidae


D is for Dodo Bird and Dromornithidae! Yesterday we learned about extinct and prehistoric birds. We spent the afternoon outdoors at our favorite nature center reading some books including 2 of our favorite Apologia's Flying Creatures and Master Books The World of Animals. We learned about several extinct birds like the Dodo, Passenger Pigeon, Great Auk and Red Rail. And we learned about prehistoric birds like the Archaeopteryx, Bambiraptor, Caudipteryx and Dromornithidae.


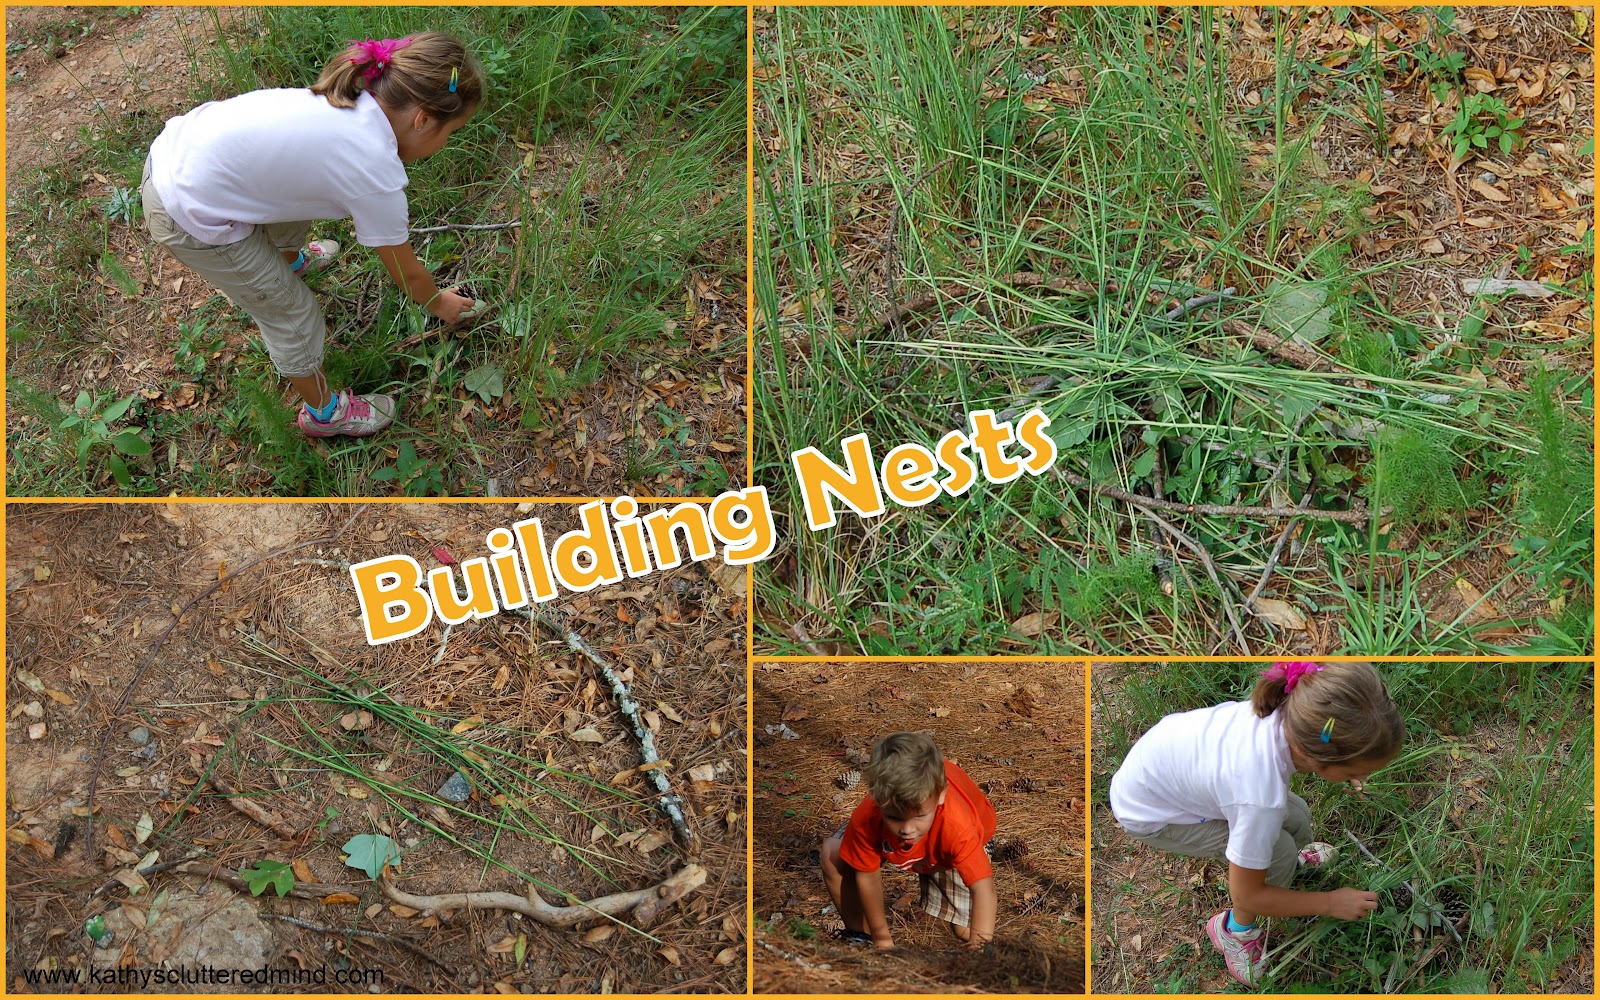
While at the nature center the kids made bird nests for their made up extinct birds. Gwyn named hers a Niledong....


When we got home we designed extinct bird eggs...


And then we drew our very own extinct birds. I love the names Gwyn comes up with. Her picture is on the left and is a Blue Hen Giggler....


Today we made some feather fossils in the kitchen using Plaster of Paris...


They are super easy to make here is how we did them.

Instructions:
1) Mix the Plaster of Paris per the directions on the box.
2) Pour the plaster into a container of your choosing. A plastic container, styrofoam cup or aluminum pan work well.
3) Decide what objects you will be using to make fossils of. Leaves, sticks, sea shells, feathers, etc.
4) Coat the side you are placing into the plaster with petroleum jelly to make them easier to remove.
5) Stick the items detailed side down into the plaster.
6) Let the plaster harden about 1/2 an hour and then pop your objects out. You should also be able to remove the plaster from the container as well.


I also found these two videos which my daughter loved because she is a HUGE Myth Busters fan. Mythbusters - Fascination with the Dodo Bird Part 1 and Part 2 with Adam Savage (there is a couple bad words).

And here is a FREE Dinosaur Lapbook from Homeschool Share!!!

What kinds of scientific fun have you been having?

Linking up with this week:
Educating Laytons, Ben and Me, Slowly Natural, Upside Down Homeschooling, I Can Teach My Child, Adventures in Mommydom, A Little R & R, JDaniels4Mom, Adventurez In Child Rearing, The Momma Knows

Tuesday, September 18, 2012

Bird Beak Comprehension - Eating Like A Bird


C is for Comprehension! Yesterday we had a lot of fun learning about bird beaks. To make it easier for the kids to comprehend just how different all bird beaks are and how their beaks play an important role in the types of food they eat we did a fun experiment in the kitchen of course (where most of our experiments take place).

I got the idea off the Birds Lesson Plan on Squidoo. I adapted it a little bit because we didn't have all the correct materials.


After the experiment we watched this video on YouTube.


Then we read some books about nests, eggs, beaks and owls.


After we finished reading we put together some bird nest building stores. The kids gathered various supplies that birds would use to build nests out of then we put them on the balcony. We also filled some saucers with water and refilled our bird feeder. We are hoping to attract some birds to our balcony so we can do some birdwatching from the schoolroom window.


Free Beak Learning Resources:
-Bird beak book
-Bird adaptions worksheets
-A worksheet that could be used with the experiment (even includes some math)
-Bird Beak Adaptations - pictures of different beak types with descriptions. You can also choose to print the PDF which has the pictures along with notebooking lines
-Beak matching worksheet
-Bird beak slide show

What kinds of scientific fun have you been having?

Linking up with this week:
Educating Laytons, Ben and Me, Slowly Natural, Upside Down Homeschooling, I Can Teach My Child, Adventures in Mommydom, A Little R & R, JDaniels4Mom, Adventurez In Child Rearing, The Momma Knows

Friday, September 7, 2012

Eggstraordinary Science Eggsperiments

Image(s): FreeDigitalPhotos.net

We had a eggstraordinary time doing our Bird unit study science eggsperiments this week. The kids were eggstatic the entire time. These 4 eggsperiments are quick, easy and cheap to do. All you need to do them are some eggs, vinegar, ball, feathers, water, oil and a couple containers.

The Bouncy Egg Experiment:
This is so much fun. Check out this great video to find out more about how to do this experiment. Before we started the experiment I cracked open an egg and let the kids explore the various parts, membrane, shell, yolk, etc. Then we watched the video so they could better understand the experiment. After they watched the video we gently placed our raw egg into a jar of vinegar. The kids were fascinated with the bubbles and how the egg started to grow bigger. I explained to them that the Calcium Carbonate in the egg shell was reacting with the vinegar forming Carbon Dioxide (the bubbles). Of course I asked them, "what is CO2?" They were not sure but after a hint (I breathed in very deeply) they got it right. We also discussed that the egg gets bigger because of osmosis.


After 24 hours our egg was was ready and the shell was dissolved. It did bounce (we used a raw egg) and the kids had some fun until...one of them dropped it too high and it broke. Before it broke we held it up to a light and got to see how translucent it was. We could even see the yolk! After it broke though it gave the kids an opportunity to see the membrane a little better.


Egg Strength Experiment:
We learned about how strong an egg REALLY is! We squeezed the egg in our palms and even stepped on it. I explained to the kids how its shape (which is made up of arches) helps it with evenly distributing pressure. Thus the egg doesn't break. We discussed why strength is important and how it helps protect the eggs when the mother and father sit on them. Check out this more detailed eggsperiment (great for older kids).


Egg Shape Experiment:
This one also relates to the shape of an egg. We rolled an egg and a ball at the same time to see how they rolled differently. The kids noticed that an egg rolls in a more circular motion and that it stops more quickly than the ball which very quickly rolls away. I asked the kids why the shape of an egg is important and they came up with a couple of good reasons: its less likely to roll out of a nest and easier for a bird to move if they needed to.


Feather Experiment:
And we learned about preening by examining and doing a little experiment with bird feathers. We had 3 Duck feathers. One we kept dry, one we soaked in water and one we rubbed oil on. We compared the weight of the dry and wet one first. We dropped them to see which one fell more quickly and recorded our findings. Then we dipped the one with oil on it into the water and watched the water bead up instead of soaking in. Next we compared the weight of the one with oil on it to the dry one. Again we dropped the feathers and recorded our findings. Then we compared the one with oil on it to the one soaked with water and recorded our findings. We discussed why preening is important, where the oily substance comes from and what would happen if Birds were not able to preen. Then for fun we mixed the oil and water together so the kids could get another visual of how oil and water do not mix.


I found these experiments online (links provided above) and in our Apologia Flying Creatures of the 5th Day book.

What fun experiments have you done lately?

*Disclaimer - Many of the links found on my side bars and in my blog posts are affiliate links. As a result, I might get paid money and I will most likely spend the money on homeschool supplies.

Monday, August 20, 2012

Blue Jay Dissection

Image(s): FreeDigitalPhotos.net

Monday is errand day for us, yuck. But on the way home from our final errand I spotted a road kill bird and since we just happened to pick up about 35 books on birds at the library for next months unit study I couldn't resist....yup I bagged it. The bird was located just around the corner from our home so we parked the car at the apartment and then took a short walk to where I saw the bird. Turns out it was a Blue Jay...pretty cool right?  It was laying in a turning lane on the road so while the kids waited on the sidewalk I cautiously picked it up using a grocery bag. I also collected a few pretty blue feathers that were laying nearby too. It was pretty decomposed already but it was still an opportunity to get in some science learning fun. We took the bird out on the balcony, grabbed the goggles, magnifying glass, baggies, a few tools and then had fun exploring. All of the bones were too brittle to preserve but we did manage to save a foot, the beak, wings and some feathers. I bagged the items and will be following the directions from this website to preserve them for our bird board.


So have you ever explored or dissected dead critters?


Linking up with:
Educating Laytons

 
Designed By: Wacky Jacqui's Designs